You can safely trim your dog’s nails via working slowly, using sharp clippers or a grinder, and taking tiny slices so you don’t hit the quick. Set up a calm spot with bright light, treats, and a towel, then handle paws gently and praise often. Watch nail underside for a chalky ring or pink quick, stop well before it, and keep styptic powder ready for slips. Schedule trims every 3–4 weeks and continue to learn more.
Why Regular Nail Trims Matter for Your Dog’s Health
Regularly trimming your dog’s nails keeps them comfortable and helps prevent small problems from turning into painful ones.
You notice their walk is steadier whenever nails are right. Long nails change gait and posture, and that can strain hips and shoulders over time.
Watch for behavioral impacts like reluctance to jump, sudden pauses on walks, or extra licking at paws. Those signs matter whenever you do a mobility assessment at home.
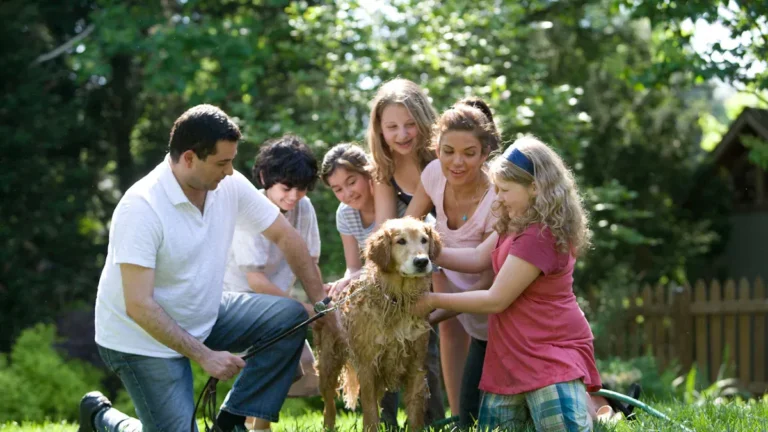
You belong to a group who cares, and you can help your dog feel safe during trims. Start slow, touch paws often, and praise calm behavior. Use short sessions and treats.
Should your dog resist or shows pain, ask a pro for guidance before continuing.
Understanding Nail Anatomy and Safe Length Targets
You’ll learn how each nail has a hard outer shell and a sensitive quick inside, so you’ll know why careful trimming matters.
You’ll also see how light nails show a pink quick while dark nails need tiny cuts until a gray or black spot appears, which tells you to stop.
With that in mind, you’ll aim to keep nails short enough that they don’t touch the ground and stay within the natural curve to avoid pain and problems.
Nail Structure and Quick
At the moment you look closely at a dog’s nail, you’re actually seeing two parts that work together and affect how much you can safely trim. You get the hard outer nail and the inner quick. You care about quick sensitivity, so you watch for signs before you cut. You practice growth monitoring to keep nails from touching the ground and changing gait. You’ll learn to stop before the quick to prevent pain and bleeding. You belong to a group who helps dogs stay comfortable, and that matters.
| Visible part | What to watch for |
|---|---|
| Outer nail | Shape, cracks, length |
| Inner quick | Pink in light nails |
| Dark nails cue | Chalky or dark center |
| Dewclaw | Often overgrows and curls |
Light Vs Dark Nails
Seeing the quick clearly in light-colored nails gives you a big advantage while trimming, because the pink core is an obvious stop sign you can watch for as you clip. You’ll feel more confident whenever you see that pink line.
With dark nails you’ll rely on small cues instead. Look for a chalky white ring or a tiny black dot in the cut surface as you take off thin layers. Coat color and genetic factors affect how visible the quick is, so dogs in your group might differ.
Touch the toe, take tiny cuts, and pause to inspect. Build trust with gentle praise and breaks. Practice makes you and your dog relaxed, and you’ll learn each paw’s quiet signals.
Proper Nail Length
Assuming you’ve been watching how the quick shows up in light and dark nails, you already have a great head start for grasping how short to make each nail.
You want nails that stop short of the quick and don’t touch the ground when your dog stands. That keeps toe spacing natural and preserves healthy weight distribution through the paw. You’ll check each toe, trim small amounts, and watch the nail shape. Be gentle and steady so your dog feels safe and connected to you.
- Look for the gray or white ring in dark nails before you stop.
- Trim to follow the natural curve, not straight across.
- Keep dewclaws shorter than ground-contact nails.
- Use short cuts and frequent checks.
Choosing the Right Tools: Clippers, Grinders, and Supplies
Picking the right tools makes nail trimming less scary for both you and your dog, so start matching gear to your pet’s size, coat, and temperament.
Choose scissor style clippers for big or thick nails and guillotine or plier style for smaller paws. Should your dog dislike snapping sounds try a grinder for gentle shaping and smoothing. Keep blades sharp so you cut cleanly and avoid splinters.
Put styptic powder, cornstarch, or flour in your kit in case the quick gets nicked. Pack a simple travel kit with spare blades, a file, treats, and a small towel.
You could treat trimming like a mini professional manicure, practicing touch and praise. That calm routine helps you and your dog feel safe and connected.
Preparing the Environment and Gathering What You Need
Now that you’ve picked the right clippers or grinder and put together a basic kit, it helps to shape a calm space where trimming feels safe for both of y’all. You want a spot that welcomes your dog and makes you feel confident.
Start by choosing a quiet room and set a gentle lighting setup so you can see nail tips without harsh glare. Play low volume ambient music assuming your dog finds it soothing. Arrange tools within reach and keep treats handy. The right scene helps you move smoothly from prepping to trimming.
- Soft mat or towel to steady your dog and collect clippings
- Bright task lamp for close work plus balanced room lighting
- Small bowl of high value treats and calm praise
- Styptic powder, file, and backup clippers nearby
Conditioning and Desensitization Techniques for Calm Trims
Start near gently handling your dog’s paws every day so they get used to touch and pressure in small, calm steps.
Pair each touch with tasty rewards and praise so your dog learns that clippers or a grinder mean good things and not fear.
As you build this routine, gradually introduce the tools at a distance and then with brief, reward-filled sessions so your dog stays relaxed and trusting.
Gradual Handling Exposure
Whether you pet your dog on the couch or handle their paws at play, gradual handling exposure helps build calm, confident behavior during nail trims. You start with slow introductions and gentle touch. You let them learn your rhythm. You keep sessions short and warm, so trust grows. You practice paw handling during cuddle time and game time so pressure never surprises them.
- Sit quietly and stroke legs, then lift one paw for a second before letting go
- Gently press pads so toes extend, then reward calm posture and breath
- Let them sniff clippers or a grinder turned off while you hold the paw
- Increase hold time gradually over days, keeping voice soft and movements steady
You belong to a calm grooming routine together.
Reward-Based Desensitization
Pairing treats with gentle handling helps your dog learn that nail care means something good, not fear. You’ll use positive reinforcement to build trust through giving tasty rewards while you touch paws, press pads, and lift toes.
Begin with short sessions and gradual exposure to tools and touch. Let your dog sniff clippers or grinder, then reward calm behavior.
Move slowly to light taps on nails, then tiny clips or brief grinder passes, always following with praise and treats. Should your dog shows stress, pause and return to easier steps.
Do sessions in a quiet spot where your dog feels safe. You’ll grow a bond this way, and each calm moment makes the next trim easier and kinder.
Step-by-Step: Holding the Paw and Extending the Nail
Whenever you hold your dog’s paw gently but with purpose, you give them both comfort and confidence, and you make it much easier to extend each nail without twisting or startling them.
Use gentle restraint and calm motion so your dog relaxes. Keep paw positioning natural, with the leg near the body. You’ll feel the pad and toe bones to guide you.
- Cradle the paw in your palm, thumb on top, fingers under for steady support.
- Press the pad gently to extend the nail, so the quick stays protected and visible.
- Keep the wrist straight to avoid twisting the toe and to keep your dog comfortable.
- Speak softly and offer small treats between nails to build trust and a sense of belonging.
Using Clippers Safely: Angles, Small Cuts, and Quick Indicators
Whenever you clip your dog’s nails, hold the clippers at a slight 45 degree angle so the cut follows the nail’s natural curve and leaves a floor-parallel edge.
Take off only small slices at a time, checking after each cut for the quick indicator so you stop before you get too close.
In case you move slowly and praise your dog between tiny cuts, you’ll keep them calm and avoid painful mistakes.
Proper Clipper Angle
Because a small change in angle can keep you well away from the quick, holding clippers at about a 45° tilt matters more than you could envision. You’ll find angle consistency helps you and your dog feel safe. Keep the clipper bevel maintenance in mind so edges stay smooth and predictable. Hold the paw gently, align the blade with the nail curve, and let your hand be steady.
- Tip the clippers so the cutting surface follows the natural nail curve
- Watch the nail’s underside as a guide for safe stopping points
- Keep wrist motion small to avoid sudden shifts toward the quick
- Check blades often for burrs and file or replace as required
You belong to a community learning this together.
Trim in Small Cuts
You’ve got the clipper angle down and a steady hand, so now focus on taking the nail off in several small cuts rather than one big snip.
Take short sections from the tip, watch the nail face, and pause after each cut. This gives you time to read behavioral cues like tension, tail movement, or sudden stillness. It also reduces the chance of hitting the quick and keeps your dog calm.
Small cuts build confidence for both of you and improve traction improvement by keeping nails at the right length so paws meet the ground naturally.
Use gentle praise and treats between cuts. Should you see a chalky ring, pink core, or black dot, stop.
Practice often, stay patient, and you’ll belong to a calmer grooming routine.
Using a Nail Grinder: Technique, Safety, and Finishing Touches
A nail grinder can ease trimming for dogs that dread clippers, so start slow and make it a calm, positive experience.
You’ll choose grit selection for coarse removal then finer grit for smoothing.
Commence with noise habituation through letting your dog sniff the off tool, then turn it on at distance while rewarding calm behavior.
Work in short sessions and keep touch gentle.
- Hold the paw steady and press pad to expose the nail, using light, brief passes.
- Angle the grinder slightly and remove small amounts from the bottom initially, afterwards shape the tip.
- Watch for heat and stop to cool the nail should it feel warm.
- Offer praise and treats after each nail to build trust and belonging.
Managing Accidents: Stopping Bleeding and When to Seek Help
Should you nick the quick, stay calm and focus on stopping the bleed so your dog feels safe and you can act clearly.
To start, reassure your dog with soft words and gentle petting so they stay still.
Next, apply firm pressure with a clean gauze or cloth for several minutes.
In the event you have styptic powder, cornstarch, or flour use it now and press gently to help clotting.
Keep speaking kindly and offer a small treat once bleeding lessens.
Monitor bleeding management and watch for emergency indicators like heavy spurting, blood that soaks through dressings, pale gums, fainting, or nonstop bleeding after ten to fifteen minutes.
Should you see any of those, call your vet or head to urgent care right away.
Aftercare and Scheduling Regular Maintenance
- Set a calendar reminder every 3 to 4 weeks and adjust according to season whenever growth changes.
- Take note of activity level and trim more for active dogs that wear nails down.
- Keep a small kit with clippers, file, and styptic powder ready.
- Reward calm behavior with treats and warm praise to build trust.